In a perfect world, the lighting in the foreground and background of every shot would be exactly the same. Unfortunately, perfect lighting situations are extremely rare in the real world, so we’ve got to know how to create them ourselves.
While achieving truly perfect lighting is a difficult task, it’s not hard to avoid the most common mistakes. Here are a few precautions that you should make sure to take when lighting your shot:
Keep Your Subject Away from the Window
It might be tempting to put your subject in front of a window, especially if it looks out on a pleasant view like a beach or a garden. But while this view may look great in person, it will likely create a lighting nightmare on camera.
Generally, to make a shot like this work, you need to compensate with the light in the foreground in order to match the light coming in from the window. You can accomplish this in two ways, and neither of them are ideal:
- You can increase the exposure on the camera to match the light coming in. Unfortunately, this technique will result in the window being completely washed out to the point of appearing white. This looks unattractive and defeats the purpose of the original shot—having a nice view behind your subject.
- Bringing in artificial lighting. When done correctly, this will solve the problem, giving you the lighting effect you want. However, artificial lighting is expensive and cumbersome to deal with. The end result is rarely worth the cost and effort necessary to achieve it.
It’s best to just avoid windows altogether. When you can’t avoid them, try to make the light work for you instead of against you by putting the subject on the other side of the room, opposite the window. This way, the subject is bathed in natural light from the window, and you don’t have to compensate for contrasting light in the background.
Be Wary of Office Lighting
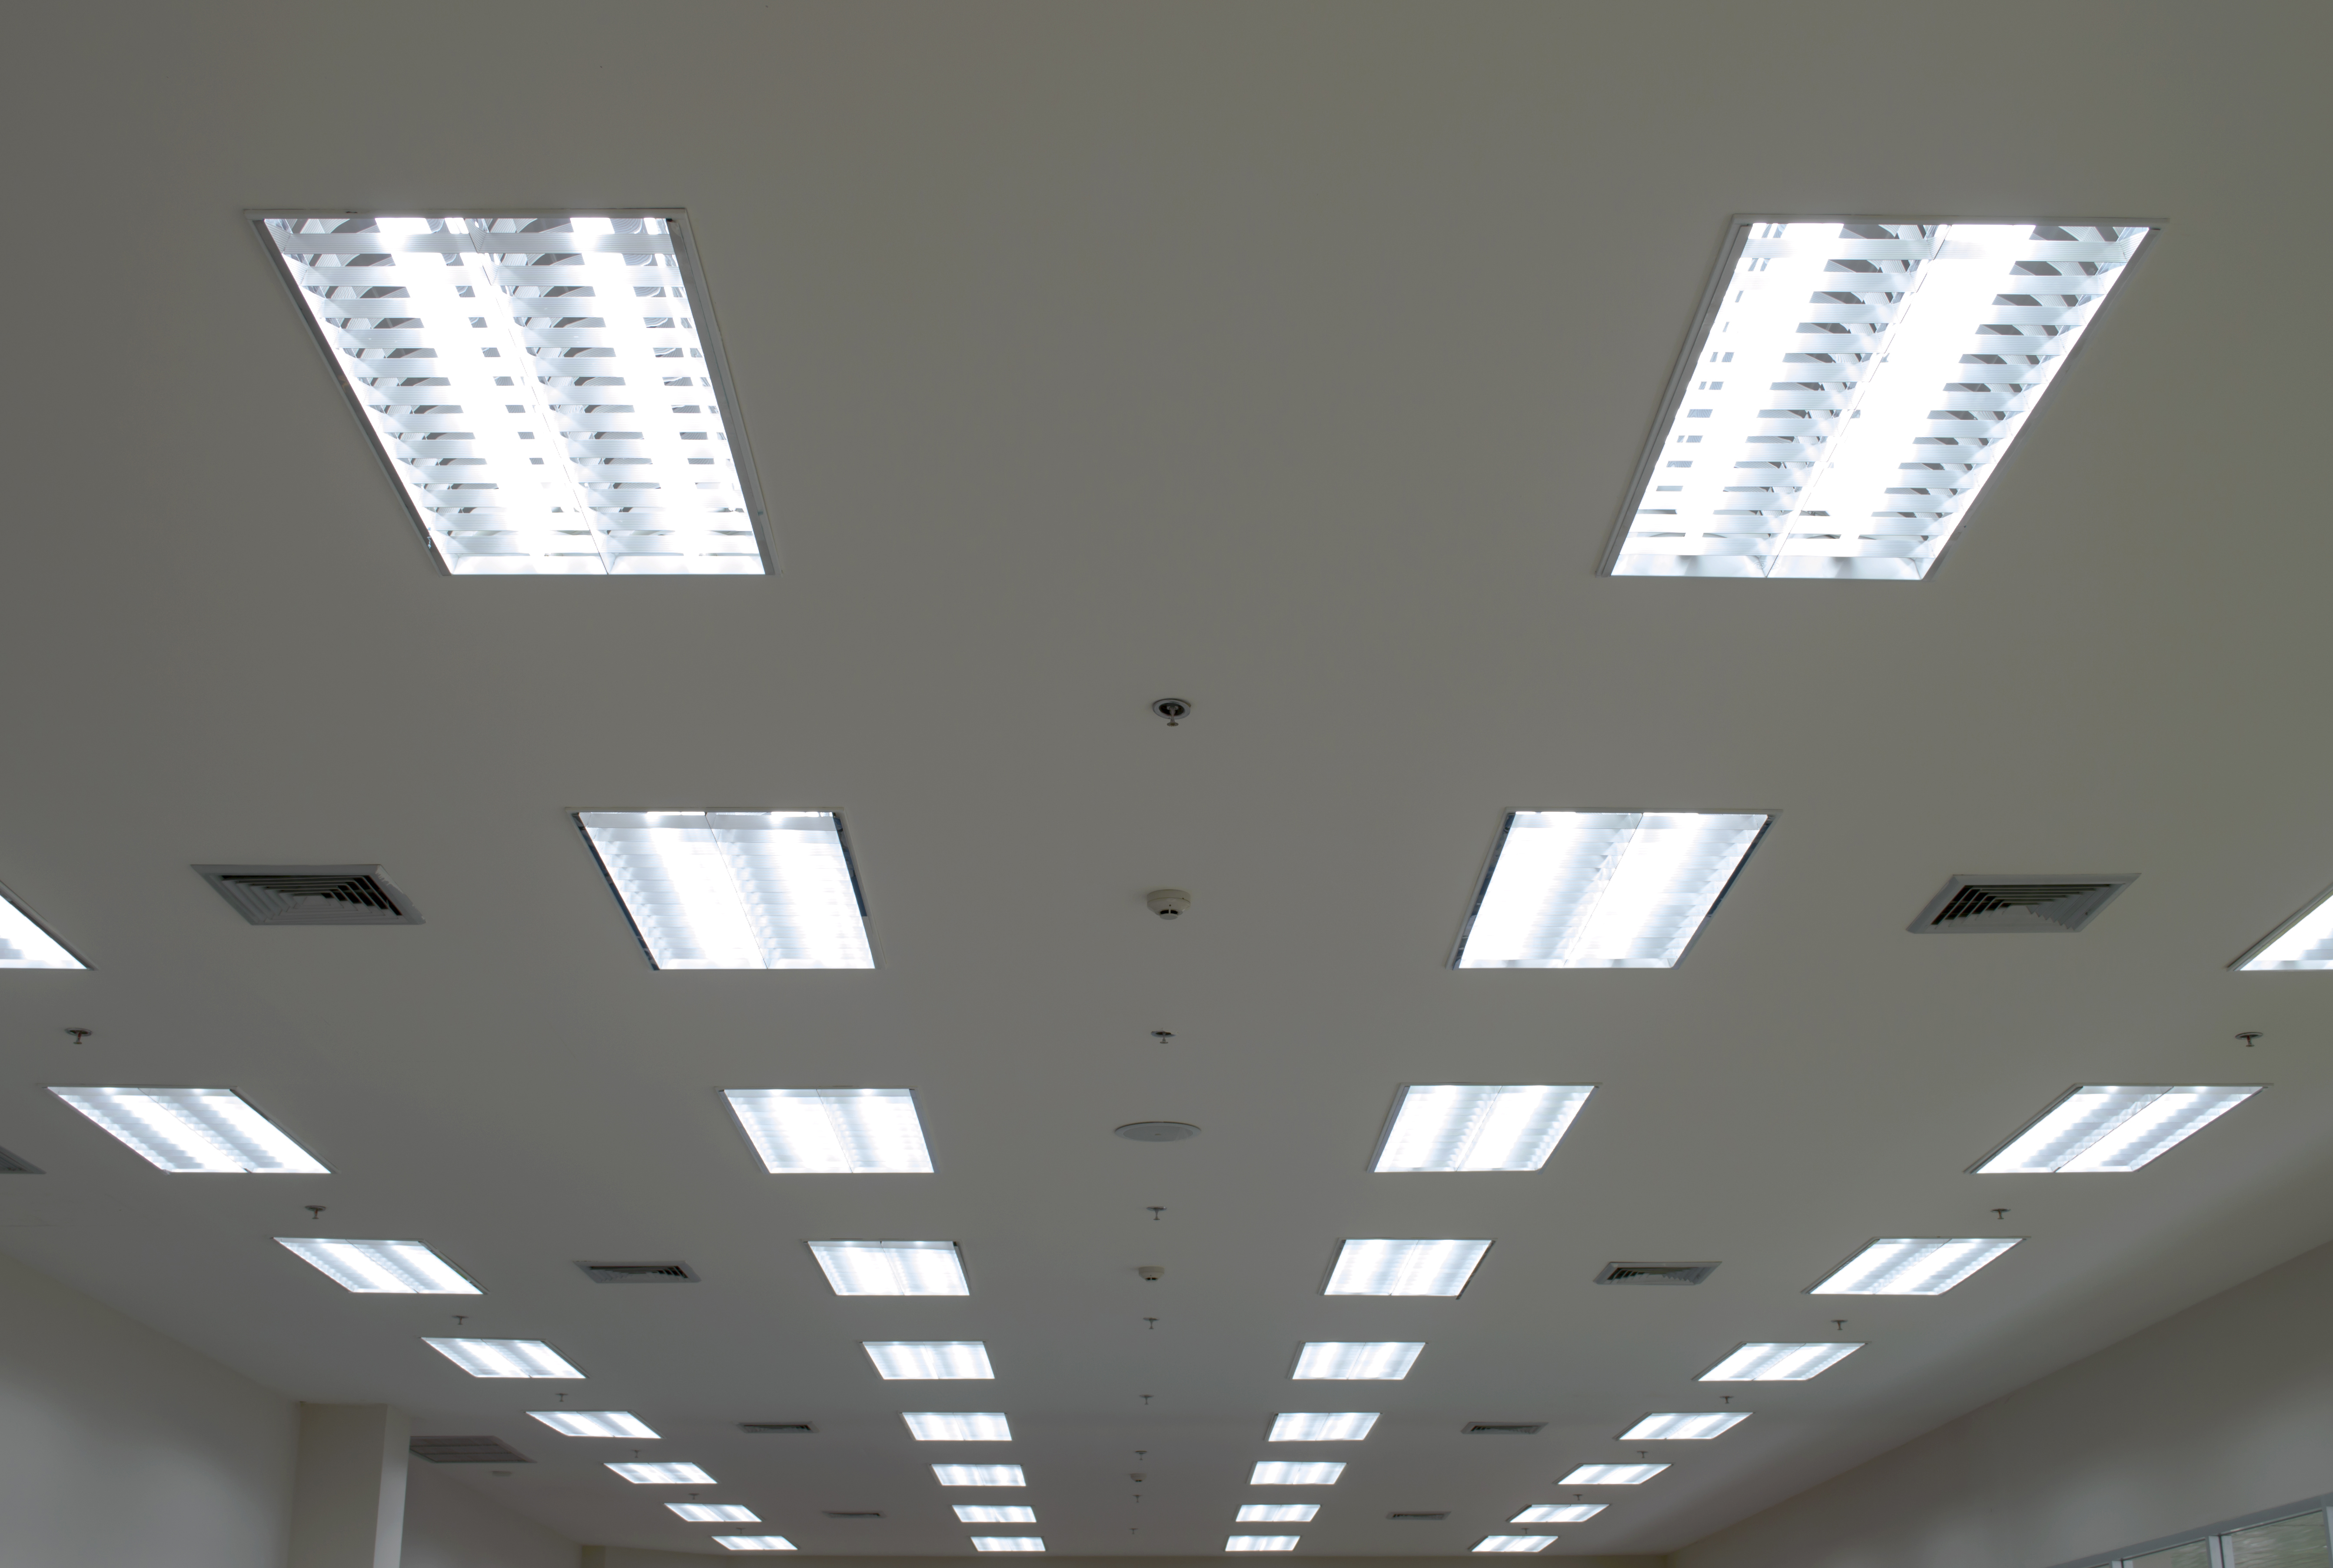
Many conference halls and indoor offices are lit with recessed ceiling lights. In person, these do a good job of lighting up the space brightly, but on camera, they can create issues.
The main problem with recessed lights, also known as “can lights,” is that they create harsh shadows. Because the light is coming from above, the subject’s head will often create a shadow that appears on their chest. This problem is made even worse when the lighting creates a “hot spot” on the subject’s head, which is especially common when filming people with short hair.
Instead of relying on recessed lights, try to find a spot with even or natural lighting. Other options include balancing out the can lights with other light sources, or even turning them off in favor of your own lighting.
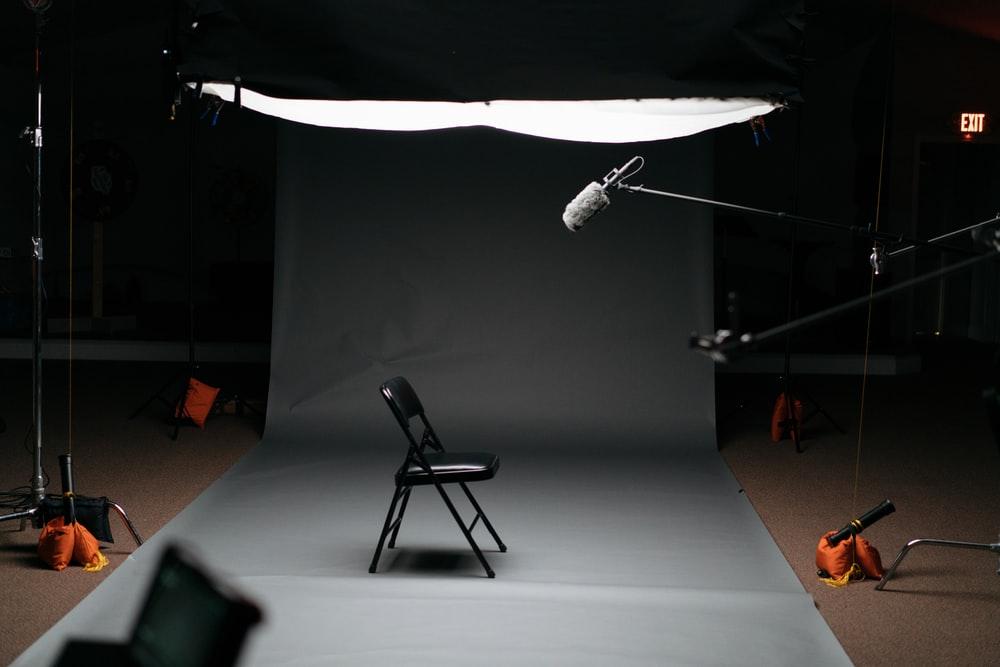
Don’t Rely on Just One Light Source
Whether the light source in question is an overhead recessed light or a direct light behind the camera, problems can arise when you rely on just one source. Without balanced lighting, issues with shadows and lack of depth will always crop up. In the absence of natural light, you should aim to use plenty of soft light that is evenly distributed through the entire shot. This is best achieved with multiple light sources.
Regardless of how you set up your lighting, it’s critical to understand how things will look on camera before you begin filming. Before you get started filming your interview or scene, make sure you know how you will light the shot. It’s best to try different rooms, positions, and lighting techniques in the space you plan to record your interview in before you start filming.
Getting things right the first time around with the best lighting for video will save you the headache of needing to re-record scenes that were ruined by low-quality lighting.
This Article was written by
It is a long established fact that a reader will be distracted by the readable content of a page when looking at its layout. The point of using Lorem Ipsum is that it has a more-or-less normal distribution of letters.