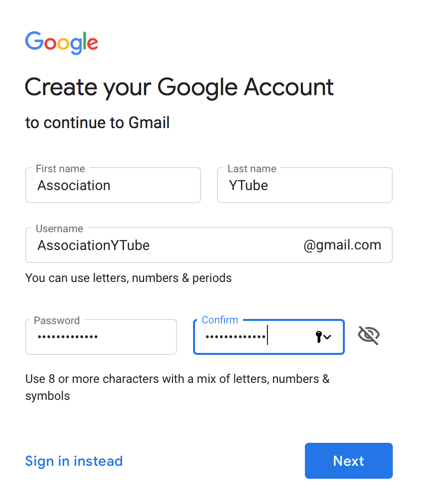
To start your very first YouTube Channel, you first need a GOOGLE account/email.
Go to GOOGLE.com and create a new email
Now GO TO https://www.youtube.com
and Click “SIGN IN”
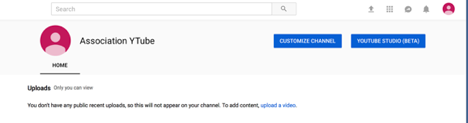
Once signed in you’ll see the following:
![]()
Clicking on the RED PROFILE picture will bring down another MENU:
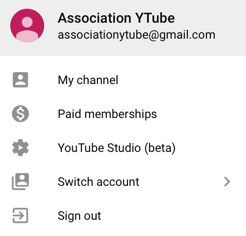
Click on MY CHANNEL
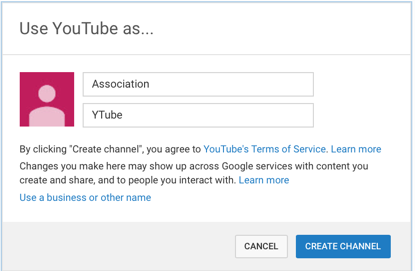
Click on CREATE CHANNEL to Create Your Channel and you will be creating your first channel! Now, don’t worry. You can change the name of your channel at any time.
Click on CUSTOMIZE CHANNEL and we can start to customize the look of your channel.
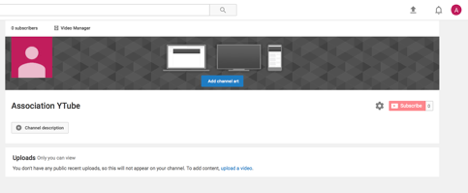
Click on CHANNEL DESCRIPTION and you will be able to insert your channel description.
Make your channel description as interesting as possible, as you want people to be drawn to it. This will become your ABOUT page, so when people want to read about what your channel is about, they’ll do so here. Don’t worry if you’re not exactly sure what your channel will be about yet, as you can change the text at any time.
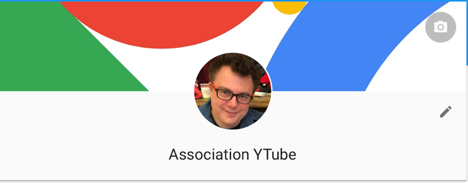
Now click on the photo in the upper left corner. This is your PROFILE photo and will be used for whenever you leave comments. If your channel is an official Association Channel then you might want to put in your Association Logo in, rather than a person’s face. However, each channel is unique – and again, you can change this at any time.
When you click on the pen symbol you can change the photo – and you will be directed back to your Google account – where you can upload your photo. Open this page in a new window.
Unfortunately, you can’t upload a photo directly to YouTube, and need to wait for Google to connect to YouTube for your profile photo to appear on YouTube.
While you wait, you can proceed with the next steps.
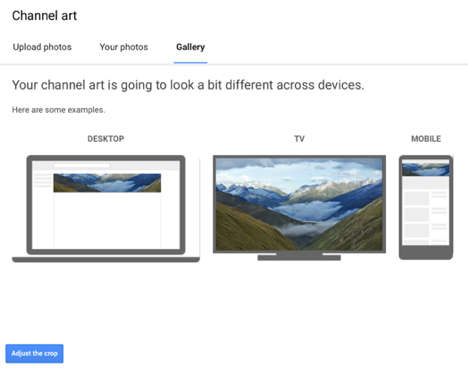
GO BACK TO YOUR CHANNEL PAGE, and Click Add Channel Art

You can upload photos or use a picture from the YouTube library. We’re going to use a photo of mountains from the YouTube library.
YouTube will show you how your channel art will look across different devices. Make sure your own artwork shows well between all the devices. You can adjust the crop by clicking on Adjust the crop
While we added the profile photo in on Google, we’re still waiting for it to transfer to YouTube – but our channel is now starting to look like a channel.

Now, click on the symbol in the TOP RIGHT CORNER: the white A in the red circle. You may have a different symbol and color dependent on the name of your channel, or if your profile picture has loaded in the top right, click on that.
A menu comes down, giving you a rectangular link to THE CREATOR STUDIO
Click on CREATOR STUDIO.
YouTube has recently changed its DASHBOARD. Most people prefer the ease of use of THE YOUTUBE STUDIO CLASSIC. You will see the link to that in the LEFT CORNER. Click YouTube Studio Classic.
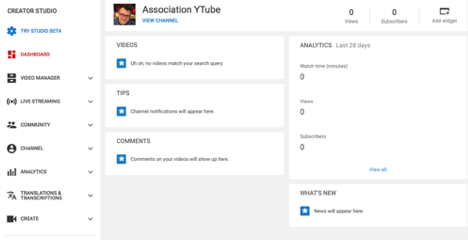
Click VIEW CHANNEL and you will see the VIEW of your channel. Now Click CUSTOMIZE CHANNEL
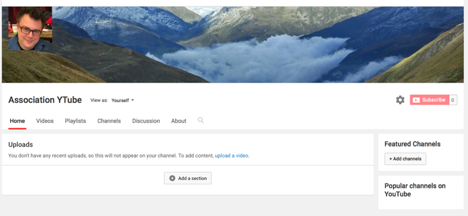
On the right side, you’ll see it says Featured Channels. Click +Add channels and add some channels that will be similar to yours. You want to do this, as YouTube will then recommend you also across YouTube. If you don’t know any other channels yet, leave this for now, but make sure to come back to it at some point.
Click ABOUT
Click Email and you can add in your email that you want to make public, so people can contact you.
Under Location, add the country you are in.
ADD LINKS
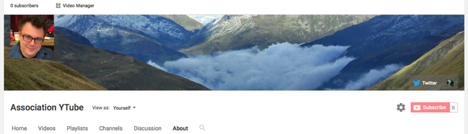
Here you can ADD LINKS. Add links in here to your other social media platforms and website. When you add in your links, put the most important one at the top, as well as a description. This is the only description that is then written out and shown as an overlay on your banner.
Here, I added TWITTER first, then a website second. You can see how they are now overlaid on your banner, enabling people easily to click on them.
Now, the only thing that you have left to do is UPLOAD your first video:
![]()
Go to the arrow icon in the top right corner. You can either drag your video to it, or CLICK ON IT.
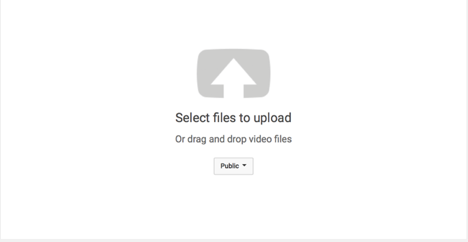
Clicking where it says Public, brings down one last window – which tells you how your video is uploaded.
There are 4 different ways you can upload a video:
PUBLIC
Everyone in the world can see your video
UNLISTED
The video is published, but only people with a particular link can see the video
PRIVATE
Access to this video is only granted to those people you invite to watch it
SCHEDULED
Here you can schedule the video for a future date, at which point it will be made public
This Article was written by
It is a long established fact that a reader will be distracted by the readable content of a page when looking at its layout. The point of using Lorem Ipsum is that it has a more-or-less normal distribution of letters.